Oster Microwave Instruction Manual: A Comprehensive Guide
Welcome! This manual provides detailed guidance for your Oster microwave, covering operation, safety, features, and troubleshooting. Explore YouTube reviews and sales information for enhanced understanding.
Congratulations on selecting an Oster microwave oven! This appliance is designed for convenient and efficient cooking, defrosting, and reheating. Before your first use, please take the time to thoroughly read this instruction manual. Understanding your microwave’s features and operating procedures will ensure optimal performance and longevity.
Oster microwaves are known for their reliability and user-friendly design. Recent online resources, including YouTube reviews, highlight both standard models and those with grilling capabilities. Whether you’ve chosen a basic model or one with advanced features, this guide will walk you through everything you need to know. Explore current sales and discounts to maximize your investment!
This manual covers essential aspects, from safety precautions to detailed operating instructions, helping you unlock the full potential of your new Oster microwave.
Safety Precautions

Important Safety Instructions: To ensure safe operation of your Oster microwave, always adhere to these precautions. Never operate the microwave empty, as this can damage the magnetron. Use only microwave-safe containers; avoid metal, as it can cause sparks and fire. Ensure proper ventilation during operation – do not block vents.
Regularly inspect the power cord for damage and do not use if frayed. Keep the microwave clean to prevent grease buildup, which can be a fire hazard. Supervise children when using the appliance. Do not attempt to repair the microwave yourself; contact qualified service personnel for assistance.
Be cautious when heating liquids, as they can become superheated and erupt violently. Always use oven mitts when removing hot items. Following these guidelines will help prevent accidents and ensure years of safe use of your Oster microwave.
Parts and Features Identification
Familiarize yourself with your Oster microwave’s components: The Control Panel houses the buttons for operation, including power level selection and pre-set programs. The Turntable ensures even cooking by rotating food. The Waveguide Cover protects the magnetron. The Door features a viewing window and safety interlocks.

Inside, you’ll find the Cavity, the cooking chamber itself. The Ventilation Grills allow for proper airflow. Locate the Model Number (essential for support and parts ordering – see dedicated section). Some models include a Grill Rack for grilling functions.
Refer to diagrams within this manual for precise locations. Understanding these parts will aid in operation, cleaning, and troubleshooting. Regularly inspect these components for damage or wear, ensuring optimal performance and longevity of your appliance.
Control Panel Overview
The Oster microwave control panel is designed for intuitive operation. The Number Pad allows direct time entry in minutes and seconds. Power Level buttons adjust cooking intensity (Low, Medium, High, etc.). Pre-set buttons (Popcorn, Potato, Pizza) automate cooking for specific foods. The Start/ +30 Sec button initiates cooking or adds 30 seconds to the timer.
The Stop/Clear button halts operation and resets the timer. A Display Screen shows cooking time, power level, and status. Some models feature a Clock function. Explore the various buttons to understand their functions. Refer to the ‘Basic Operating Instructions’ section for detailed usage guidance. Online resources, like YouTube reviews, can also demonstrate panel functionality.
Basic Operating Instructions
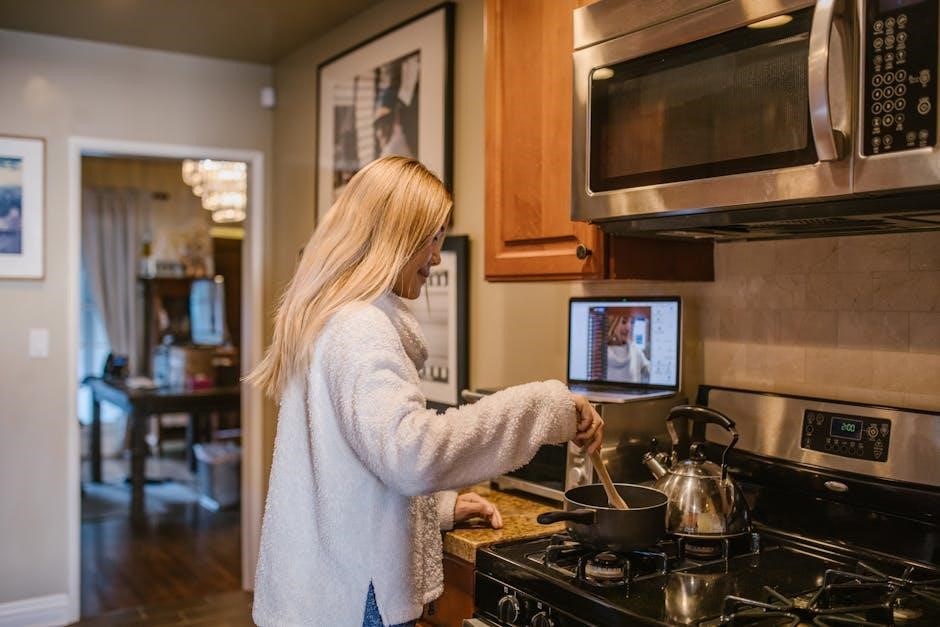
To begin, ensure the microwave door is securely closed. Press the Number Pad to enter the desired cooking time – for example, ‘1’ ‘0’ ‘0’ for 1 minute, 0 seconds. Select your preferred Power Level using the corresponding buttons. If cooking with a pre-set program isn’t desired, proceed to press the Start/ +30 Sec button to initiate cooking.
The display will count down the remaining cooking time. To pause cooking, press Stop/Clear. Pressing Start/ +30 Sec again will resume the timer. Remember to use microwave-safe containers. Refer to online resources, such as YouTube reviews, for visual demonstrations of these steps. Always consult the ‘Safety Precautions’ section before operation.

Setting the Cooking Time
Precisely controlling cooking time is essential. Utilize the numeric keypad to input the desired duration in minutes and seconds. For instance, to set a cooking time of 2 minutes and 30 seconds, press ‘2’, ‘0’, ‘3’, ‘0’. The microwave’s display will clearly show the inputted time. You can also increase the cooking time in 30-second increments by repeatedly pressing the Start/ +30 Sec button – a convenient feature for quick adjustments.
Always double-check the displayed time before initiating the cooking process. Remember that longer cooking times are necessary for larger quantities of food. Explore online resources for guidance on optimal cooking times for various dishes. Proper time setting ensures food is cooked thoroughly and safely.
Power Levels Explained
Oster microwaves offer variable power levels, allowing for versatile cooking. 100% power is ideal for rapid heating and boiling liquids. 70% power is excellent for reheating cooked foods and simmering. Utilizing 50% power is best for delicate tasks like melting chocolate or softening butter, preventing scorching.
Lower power levels, such as 30% or 10%, are perfect for defrosting and keeping food warm. Selecting the appropriate power level ensures even cooking and preserves the food’s texture and nutrients. Experiment with different levels to achieve optimal results for your recipes. Refer to online resources and recipe guidelines for suggested power levels for specific food items.

Using Pre-Set Cooking Programs
Your Oster microwave features convenient pre-set programs designed to simplify cooking common foods. These programs automatically adjust cooking time and power levels for optimal results. Popular options include settings for popcorn, potatoes, and pizza, streamlining meal preparation.
To use a pre-set program, simply select the corresponding button on the control panel and follow the on-screen prompts. For example, the popcorn setting calculates the ideal cooking time based on the bag size. The potato and pizza settings similarly optimize cooking for these items. Always ensure food is properly prepared before using these programs. Refer to the manual for specific weight or quantity guidelines for each pre-set option.
Popcorn Setting
The Popcorn setting on your Oster microwave is designed for conveniently popping standard microwave popcorn bags. This pre-programmed function automatically sets the appropriate cooking time and power level, aiming for perfectly popped kernels with minimal unpopped grains. However, results can vary depending on the popcorn brand, bag size, and microwave wattage.
To use the Popcorn setting, place a standard microwave popcorn bag, label side up, in the center of the microwave. Press the “Popcorn” button on the control panel. The microwave will begin cooking, and will typically stop automatically when popping slows down. Always listen carefully; if popping slows to 2-3 seconds between pops, immediately press “Stop” to prevent burning. Never reuse popcorn bags.
Potato Setting
The Potato setting on your Oster microwave is specifically designed for baking potatoes quickly and efficiently. This pre-programmed function automatically adjusts the power level and cooking time to achieve a fluffy interior and slightly crisp skin. It’s ideal for russet potatoes, but results may vary with different varieties.
Before using the Potato setting, wash and pierce the potato several times with a fork to allow steam to escape during cooking. Place the potato directly on the microwave turntable. Press the “Potato” button on the control panel. The microwave will calculate a cooking time based on the number of potatoes entered (typically 1-4). Once finished, let the potato stand for a few minutes before handling, as it will be very hot.
Pizza Setting
The Pizza setting on your Oster microwave offers a convenient way to reheat or cook smaller pizza portions. This pre-programmed function utilizes a specific power level and cooking time to prevent the crust from becoming soggy while thoroughly heating the toppings. It’s best suited for individual slices or small, frozen pizzas.
When reheating pizza, place the slice on a microwave-safe plate. Press the “Pizza” button on the control panel. The microwave may prompt you to enter the number of slices; follow the on-screen instructions. For frozen pizzas, refer to the package directions, as cooking times may vary. After cooking, allow the pizza to stand for a minute to redistribute heat. Enjoy a quick and easy pizza experience with your Oster microwave!
Defrosting Guidelines
Defrosting with your Oster microwave is a quick and efficient way to prepare frozen foods for cooking. Always remove food from any packaging before defrosting. Utilize microwave-safe containers to prevent melting or warping. The defrost function operates by using low power levels intermittently, preventing cooking during the process.
Select the “Defrost” setting on the control panel. Enter the weight of the food you are defrosting; the microwave will automatically calculate the appropriate defrosting time. For unevenly shaped items, periodically flip or rotate the food to ensure even thawing. After defrosting, allow the food to stand for a few minutes to complete the thawing process. It’s crucial to cook the defrosted food immediately to maintain food safety.
Cleaning and Maintenance
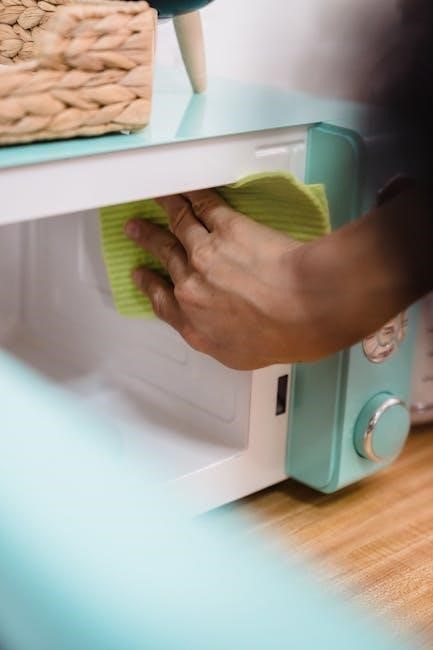
Regular cleaning ensures your Oster microwave operates efficiently and hygienically. Before cleaning, always unplug the microwave from the power outlet; Wipe the interior surfaces with a damp cloth and mild detergent. Avoid abrasive cleaners, as they can damage the interior coating. For stubborn food splatters, heat a cup of water with lemon juice for a few minutes, then wipe clean – the steam will loosen residue.
The turntable and roller ring are removable and can be washed in warm, soapy water. Clean the exterior with a damp cloth. Ensure the vent openings are free from obstructions. Avoid immersing the microwave in water. Regular maintenance extends the lifespan of your appliance and maintains optimal performance. A clean microwave is a safe and efficient microwave!
Troubleshooting Common Issues
Microwave not heating? First, ensure the door is securely closed – the safety interlock prevents operation if ajar. Check the power cord connection and the household circuit breaker. If the issue persists, try resetting the microwave by unplugging it for a minute. Food not cooking evenly? Stir or rotate food during cooking, and avoid overcrowding the turntable.
Strange noises? A slight humming is normal, but loud buzzing or arcing indicates a potential problem; discontinue use and contact support. Display not working? Reset the microwave as described above. If problems continue, consult the warranty information or contact Oster customer support for assistance. Avoid attempting self-repair, as this could void the warranty and pose a safety risk.
Frequently Asked Questions (FAQ)
Q: Can I use metal containers in my Oster microwave? A: No, metal containers can cause sparks and damage the microwave. Use microwave-safe glass, ceramic, or plastic. Q: How do I find my model number? A: The model number is typically located on a sticker on the back or side of the microwave. Refer to the Model Number Lookup section for assistance.

Q: Is it safe to heat liquids in the microwave? A: Yes, but be cautious of superheating. Stir liquids before and during heating to prevent sudden boiling. Q: Where can I find sales and discounts on Oster microwaves? A: Check online retailers and search for current promotions – YouTube reviews often highlight sales events. Q: What if my microwave isn’t working? A: See the Troubleshooting section for common solutions.
Warranty Information
Oster Microwave Warranty: Your Oster microwave is warranted against defects in materials and workmanship for a period of one (1) year from the date of original purchase. This warranty covers parts and labor for repairs necessary to restore the microwave to proper operating condition when used for normal household purposes.
Exclusions: This warranty does not cover damage resulting from misuse, abuse, accidents, unauthorized repairs, or improper installation. Damage to the waveguide cover is also excluded; To obtain warranty service, contact Oster Customer Support with your proof of purchase and model number. Retain your original sales receipt as proof of date. See Contact Information & Support for details. Modifications or alterations void this warranty.
Model Number Lookup
Locating Your Model Number: Finding your Oster microwave’s model number is crucial for accessing specific support, downloading manuals, and processing warranty claims. The model number is typically located on a sticker affixed to the rear of the microwave cabinet. It may also be found inside the door frame or on the bottom of the unit.
Why it Matters: Having the correct model number ensures you receive accurate information tailored to your specific microwave. Online searches, like those referencing sales and reviews, often require this detail. Incorrect information can lead to incompatible parts or instructions. Please have this number available when contacting Oster Customer Support for assistance. Refer to the documentation included with your purchase for precise location details.
Grilling Function (If Applicable)
Utilizing the Grill Feature: Some Oster microwave models incorporate a grilling function, offering versatility beyond standard microwave cooking. To activate, select the “Grill” setting on the control panel. Ensure the grill rack is properly positioned inside the cavity. This feature utilizes a heating element to brown and crisp food, similar to conventional grilling.
Important Considerations: When grilling, always use microwave-safe cookware designed for high temperatures. Monitor food closely to prevent burning, as grilling times can vary. Avoid using metal containers or foil. Refer to the pre-set programs or adjust cooking time manually based on the food type and desired level of doneness. Online reviews may offer insights into optimal grilling settings for specific dishes.
Sales and Discounts
Finding the Best Deals: Oster microwaves are frequently available at discounted prices through various retailers. Online platforms like YouTube showcase sales events, with some videos highlighting “big sales” and significant markdowns – even up to 71% off! Websites such as bisaliftasansor.com and berbersan.com also advertise current promotions and in-stock availability.
Where to Look: Regularly check major appliance retailers, both online and in-store, for special offers, clearance events, and seasonal sales. Comparing prices across different vendors is crucial to securing the most favorable deal. Keep an eye out for bundled offers that may include accessories or extended warranties. Utilizing price comparison tools can streamline the search process and ensure you don’t miss potential savings.
Contact Information & Support
Need Assistance? While this manual aims to provide comprehensive guidance, additional support may be required. Unfortunately, specific official Oster support contact details aren’t directly available within the provided search snippets. However, exploring the Oster website (oster.com) is the primary recommended step for accessing official customer service resources.
Online Resources: YouTube reviews, like the one linked, can offer user-based troubleshooting tips and insights. Searching online forums and appliance repair websites may also yield helpful solutions to common issues. When contacting support, have your model number readily available for efficient assistance. Retain your purchase receipt for warranty claims and potential service requests. Remember to clearly describe the problem you are experiencing.