
Your bread maker manual is an essential guide to understanding and optimizing your machine’s capabilities. It provides detailed instructions, troubleshooting tips, and recipe ideas to enhance your baking experience.
1.1 Importance of Reading the Manual
Reading your bread maker manual is crucial for optimal performance and troubleshooting. It provides precise measurements, adjustments for humidity, and maintenance tips. Accurate measurements are vital, as spoons may not be reliable. Humidity affects dough consistency, requiring less water in moist areas. Manuals also cover safety guidelines, proper usage, and error solutions. Understanding these details ensures better results and extends the machine’s lifespan. Follow the manual to master your bread maker and achieve consistent, delicious bread.
1.2 Overview of Key Features and Functions
Bread maker manuals highlight essential features like preset programs for various bread types, customizable settings for crust color and loaf size, and delay timers. Many models include advanced functions such as dough-only modes, yeast activation, and nut or fruit dispensers. Understanding these features ensures you can tailor recipes to your preferences. Manuals also explain how to navigate the control panel, adjust settings, and utilize optional modes for jam, pasta, or gluten-free options, enhancing your baking versatility and creativity.

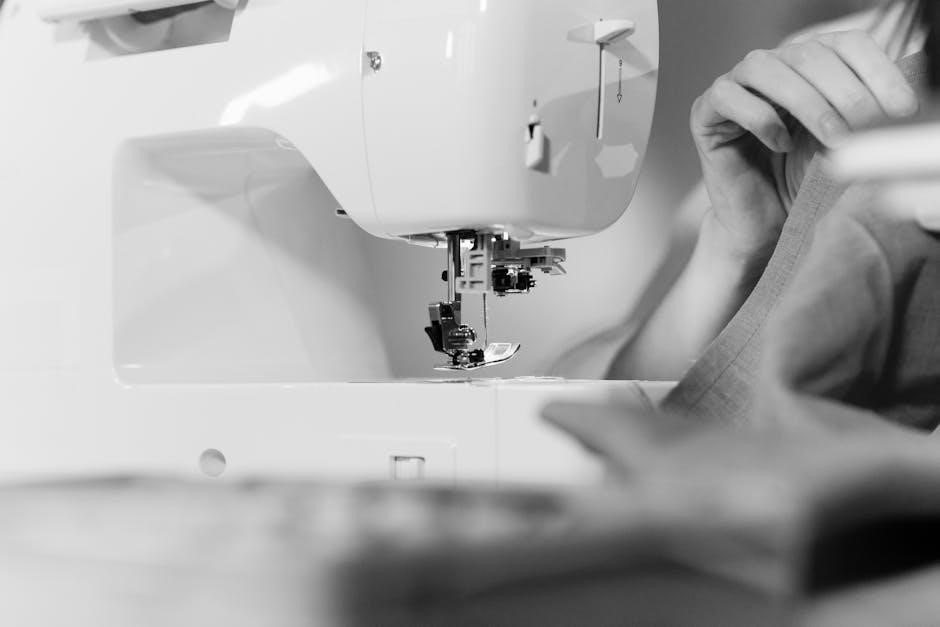
Understanding Your Bread Maker Components
Your bread maker includes a baking pan, kneading paddles, and heating element. Exterior features like a lid, display, and control panel simplify operation.
2.1 Exterior and Interior Parts
The bread maker’s exterior includes a lid, display screen, and control buttons. Inside, you’ll find a non-stick baking pan, kneading paddles, and a heating element. The pan is removable for easy cleaning, while the paddles mix and knead the dough. Some models may have additional interior features like a yeast dispenser or nut chute. Regularly inspect these parts for wear and tear, and clean them as needed to ensure optimal performance. Proper maintenance of these components is essential for consistent bread quality and longevity of the machine.
2.2 Control Panel and Button Functions
The control panel is the central interface for operating your bread maker. It typically includes buttons for selecting modes (e.g., basic, whole wheat, or gluten-free), adjusting crust color, and setting the loaf size. The start/stop button initiates or pauses the baking process, while the timer allows for delayed baking. Some models may have additional buttons for specific functions like dough-only or jam-making modes. The LCD display shows the selected settings and progress. Always refer to your manual for button-specific functions, as designs may vary between models.
2.3 Accessories and Additional Features
Your bread maker may come with accessories like a measuring cup, spoon, and bread bucket. Additional features often include non-stick interiors for easy dough release and cool-touch exteriors for safety. Some models offer viewing windows to monitor progress and delay timers for convenient baking. Programmable settings and customizable options enhance flexibility. Optional accessories, such as a dough hook or recipe booklet, can expand functionality. Always check your manual for specific features and how to use them effectively.

Step-by-Step Guide to Using Your Bread Maker
Plug in your bread maker, add ingredients in order, select settings, start the machine, and let it bake. After completion, allow the bread to cool before slicing.
3.1 Initial Setup and Preparation
Start by unpacking and cleaning your bread maker with a damp cloth. Place it on a stable, heat-resistant surface. Plug in the machine and ensure all parts are securely attached. Before first use, wash the bread pan, kneading paddle, and any accessories with mild soap and warm water. Dry thoroughly to prevent rust. Familiarize yourself with the control panel and buttons. Ensure the area is clean and free from drafts. This setup ensures smooth operation and hygienic bread making.
3.2 Measuring Ingredients Accurately
Accurate measurement is crucial for perfect bread. Use a digital scale to measure flour, yeast, and other dry ingredients precisely. For liquids, ensure the measuring cup is level and positioned at eye level. Avoid over-packing flour, as this can lead to dense bread. Scoop flour lightly into the cup and level it with a straight edge. Double-check all measurements before adding ingredients to the bread pan. Small errors can significantly affect the final result, so precision is key for consistent bread quality.
3.3 Selecting the Right Settings and Loaf Size
Selecting the correct settings ensures your bread turns out as desired. Choose from preset programs like basic, whole grain, or gluten-free, depending on your recipe. Adjust the crust color to light, medium, or dark for your preference. Select the appropriate loaf size (1 lb, 1.5 lb, or 2 lb) to match the recipe and your needs. Ensure the settings align with the ingredients and desired texture. Proper selection guarantees even baking and optimal results every time.

Basic Bread Recipes for Beginners
This section provides simple, easy-to-follow recipes perfect for new users. Start with classic white, whole wheat, or gluten-free options using minimal ingredients for delicious results;
4.1 Classic White Bread Recipe
A perfect recipe for beginners, this classic white bread is simple and delicious. Combine 2 cups of bread flour, 1 teaspoon of salt, 1 tablespoon of sugar, and 1 packet of active dry yeast in the bread maker. Add 1 tablespoon of butter and 1 cup of warm water. Select the basic bread setting and medium loaf size. Let the machine do the work for a fresh, homemade loaf ready in about 2 hours.
4.2 Whole Wheat Bread Recipe
Start with 2 cups of whole wheat flour, 1/2 cup of all-purpose flour, 1 teaspoon of salt, 1 tablespoon of sugar, and 1 packet of active dry yeast. Add 1 tablespoon of butter or oil and 1 cup of warm water. Select the whole wheat bread setting and your preferred loaf size. The machine will mix, knead, and bake, resulting in a nutritious and hearty loaf. Perfect for those seeking a healthier bread option with a richer flavor and denser texture.
4.3 Gluten-Free Bread Option
For a gluten-free option, combine 1.5 cups of gluten-free flour mix, 1/2 teaspoon of salt, 1 tablespoon of sugar, and 1 teaspoon of xanthan gum. Add 1 packet of gluten-free yeast, 1 large egg, 1 tablespoon of apple cider vinegar, and 1 cup of warm water. Select the gluten-free or basic bread setting and choose a 1.5-pound loaf size. The machine will handle the mixing and baking, ensuring a delicious, gluten-free loaf. Always use high-quality gluten-free flours for the best results.
Tips for Achieving Perfect Bread
Ensure precise measurements, use room-temperature ingredients, and check yeast expiration. Monitor dough consistency and adjust liquid or flour as needed for optimal results every time.

5.1 Adjusting for Humidity and Climate
Humidity and climate significantly impact bread making. In humid environments, reduce liquid ingredients slightly to avoid a sticky dough. In dry climates, increase liquid by 1-2 tablespoons. Temperature also plays a role; warmer climates may require less yeast or shorter rise times, while cooler climates might need a longer proofing period. Altitude can affect dough rise, so adjust yeast or salt accordingly. Monitor dough consistency and tweak recipes to suit your location for consistent results.
5.2 Understanding Dough Consistency
Dough consistency is crucial for perfect bread. A dough that’s too dry may result in dense bread, while overly wet dough can lead to a soggy texture. Achieve the right consistency by accurately measuring ingredients and adjusting based on humidity. During mixing, observe if the dough forms a cohesive ball and pulls away from the sides of the pan. If needed, add small amounts of flour or liquid, a teaspoon at a time, to reach the ideal texture. Proper consistency ensures even rising and a light, airy loaf.
5.3 Troubleshooting Common Issues
Common issues with bread makers include uneven baking, dough not rising, or the machine not starting. Check power supply and ensure the bread pan is properly placed. For uneven baking, adjust the pan’s position. If dough doesn’t rise, verify yeast expiration and ensure the environment isn’t too cold. Refer to your manual for specific solutions, as fixes may vary by model. Addressing these issues promptly ensures consistent results and extends your bread maker’s lifespan.

Maintenance and Cleaning of Your Bread Maker
Regular cleaning is essential for optimal performance. Wipe exterior with a damp cloth and clean the bread pan and paddles after each use. Avoid harsh chemicals to prevent damage. Deep cleaning periodically ensures no leftover dough or crumbs affect future batches. Proper storage in a dry place prolongs lifespan. Follow manual guidelines for specific maintenance tips tailored to your model.
6.1 Regular Cleaning Routine
Regular cleaning ensures your bread maker operates efficiently and maintains hygiene. After each use, unplug the machine and wipe the exterior with a soft, damp cloth. Remove the bread pan and paddles, washing them with mild soap and warm water. Avoid abrasive cleaners or scourers to prevent damage. Dry all parts thoroughly before reassembling. Regular cleaning prevents dough residue buildup and keeps the machine in optimal condition for consistent bread-making performance.
6.2 Deep Cleaning the Machine
Deep cleaning your bread maker is essential for removing stubborn residue and odors. Begin by unplugging the machine and allowing it to cool. Remove the bread pan and paddles, soaking them in warm, soapy water. Wipe the interior with a damp cloth, paying attention to crevices where dough may accumulate. For tough stains, mix equal parts water and white vinegar in the pan and run a short cycle. Avoid harsh chemicals or abrasive scrubbers to protect the machine’s finish.
6.4 Storing the Bread Maker Properly
Proper storage ensures your bread maker remains in great condition. Unplug the machine and clean it thoroughly before storage. Allow it to dry completely to prevent mold or mildew. Store the bread maker in its original box or a protective cover to shield it from dust. Place it in a cool, dry location, avoiding direct sunlight or moisture. Do not store ingredients inside the machine, as this can attract pests. Proper storage extends the appliance’s lifespan and maintains its performance.

Advanced Features and Customization
Explore advanced features like delay timers, custom settings, and optional modes for dough, jam, or pasta. These tools enhance versatility and personalize your baking experience.
7.1 Delay Start and Timer Functions
The delay start function allows you to set a timer for up to 24 hours, ensuring freshly baked bread at your preferred time. This feature is ideal for waking up to the aroma of freshly baked bread or having dough ready to shape when you return home. The timer function lets you control the fermentation and baking process precisely. Simply input the desired time, and the machine will handle the rest, ensuring consistent results. Always follow the manufacturer’s guidelines for setting these features to avoid overproofing or underbaking. This advanced feature enhances convenience and flexibility for any schedule.
7.2 Customizing Recipes and Settings
Customizing recipes and settings on your bread maker allows for personalized bread-making experiences. Adjust ingredient ratios, yeast amounts, and salt levels to suit your preferences. Explore custom settings for crust color, baking time, and dough texture. Many machines offer programmable memory slots to save favorite recipes. Experiment with unique combinations, such as adding herbs or nuts, to create signature loaves. Always refer to the manual for specific customization options and guidelines to ensure optimal results and maintain machine performance. This feature empowers users to innovate and tailor bread to their taste.
7.3 Using Optional Modes (e.g., Dough, Jam, or Pasta)
Many bread makers offer optional modes for versatile cooking. The dough mode allows kneading without baking, perfect for homemade pasta or pizza dough. Jam mode heats and stirs ingredients for homemade preserves. Some machines include a pasta mode for drying fresh pasta. Always follow manual guidelines for each mode, as settings vary. Experiment with new recipes to maximize your machine’s potential and explore beyond traditional bread-making. These modes add creativity and convenience to your culinary routine.

Finding and Downloading Bread Maker Manuals
Locate your bread maker manual through official manufacturer websites or third-party repositories. Ensure sources are reliable and updated for accurate information and safe downloads.
8.1 Official Manufacturer Websites
Visit the official website of your bread maker’s manufacturer to find and download the manual. Look for a ‘Support’ or ‘Downloads’ section. Use the search bar to type in your model number for quick access. Ensure the manual matches your specific model for accurate information. Download the PDF or other formats provided. Check for additional resources like troubleshooting guides. If issues arise, contact customer support for assistance. Avoid third-party sites to ensure safety and authenticity.
8.2 Third-Party Manual Repositories

Third-party websites like ManualsLib, ManualsOnline, and Scribd often host a wide range of bread maker manuals. These platforms aggregate manuals from various brands, making them easily accessible. Simply search for your specific model to download the PDF. While convenient, ensure the source is reliable to avoid outdated or incorrect versions. Be cautious of potential risks like malware and verify the manual’s authenticity before use. These sites are helpful when official sources are unavailable.
8.3 Tips for Identifying Reliable Sources
To ensure authenticity, verify the source by checking for official branding and contact information. Look for HTTPS in the URL for secure connections. Read user reviews and ratings to gauge reliability. Avoid sites with excessive ads or pop-ups, as they may be less trustworthy. Always cross-reference the manual’s content with the manufacturer’s official descriptions. Ensure the manual is dated and versioned to confirm it matches your bread maker model. Prioritize sources with clear download options and minimal sign-up requirements.
Thank you for exploring the world of bread maker manuals! Mastering your machine is key to perfect loaves. Happy baking and enjoy the journey!
Experiment with recipes, share creations, and embrace the joy of homemade bread. Your bread maker is a gateway to endless culinary possibilities—enjoy every rise!
9.1 Maximizing Your Bread Maker Experience
To maximize your bread maker experience, explore its full potential by experimenting with diverse recipes and settings. Regularly update your skills and knowledge to refine your baking techniques. Keep your machine clean and well-maintained to ensure optimal performance. Engage with online communities for inspiration and troubleshooting. Don’t hesitate to try new ingredients or adjust recipes to suit your preferences. With practice and creativity, you’ll unlock the true versatility of your bread maker and enjoy consistent, delicious results.
9.2 Encouragement to Experiment and Share Recipes
Embrace the joy of creativity by experimenting with new recipes and ingredients. Discover unique flavors and refine your techniques to create personalized bread recipes. Share your creations with friends, family, or online communities to inspire others and gain feedback. Connecting with fellow bakers can open doors to new ideas and tips. Don’t hesitate to post your recipes or join forums for shared learning. This collaborative approach will enhance your baking journey and keep you inspired to try more.